the heel, part one
Step four - starting the heel
Ok, so by now you should have your desired length of ribbing completed. Now you're ready to start the heel.
First, you must divide the stitches for the heel.
You currently have your stitches evenly divided between the needles. We must now move more stitches to one needle than the other two.
*When moving stitches, always slip as if to purl. Just like you did after casting on. DO NOT PURL the stitches, only insert the working needle AS IF you were going to purl.
On your next needle, working yarn coming from last stitch of last needle, you need 32 24 20 stitches. This is needle #1.
Keep the working yarn before the first stitch on needle #1.
On your the other two needles, you need 16 12 10 stitches. These are needles #2 and #3.
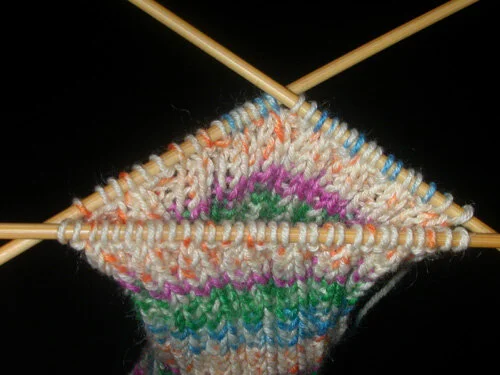
Divided for the heel
Step Five
Now we'll be working ONLY ON NEEDLE #1 for a while. Ignore the other two needles, but make sure no stitches fall off.
Work back and forth on needle #1.
Row 1 (on the right side of your work): Slip 1, Knit 1. Repeat across, turn work. ( 32 24 20 stitches)
Row 2 (wrong side): Slip one, purl across. (Slip ONLY the first stitch, purl the rest including the slipped stitches from row 1.)
Remember to slip as if to purl.
Repeat rows 1 & 2 until you have worked a total of 31 23 19 rows ending with a right side row. You can count rows easily by counting the slipped stitches on the end of the row. There will be 16 12 10 elongated slipped stitches. (You will use these later to pick up stitches for the gusset.)

Slip, knit, slip, knit, slip, knitting..

Back of row one
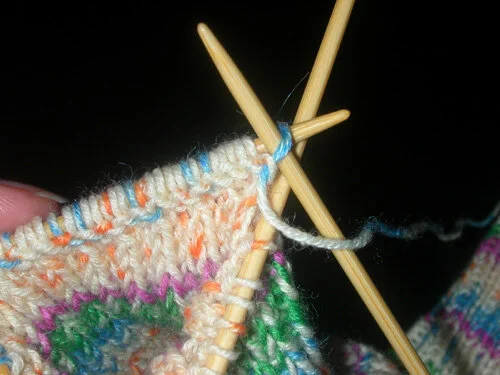
Slipping the first stitch of row two (wrong side)
Next: The heel, part two
or jump to another page